Overview
The Micron Level Editor can be used to create custom Micron levels to play locally and share on Steam Workshop.
The editor is included with your copy of Micron on Steam. You can find it at <steam>\steamapps\common\Micron\Editor.
System Requirements
The editor is available only on Windows and requires Microsoft .NET Framework 4.0. You can install .NET 4.0 from here if you need it. (You'll know you need it if you get an error when you try to run the Micron Editor.)
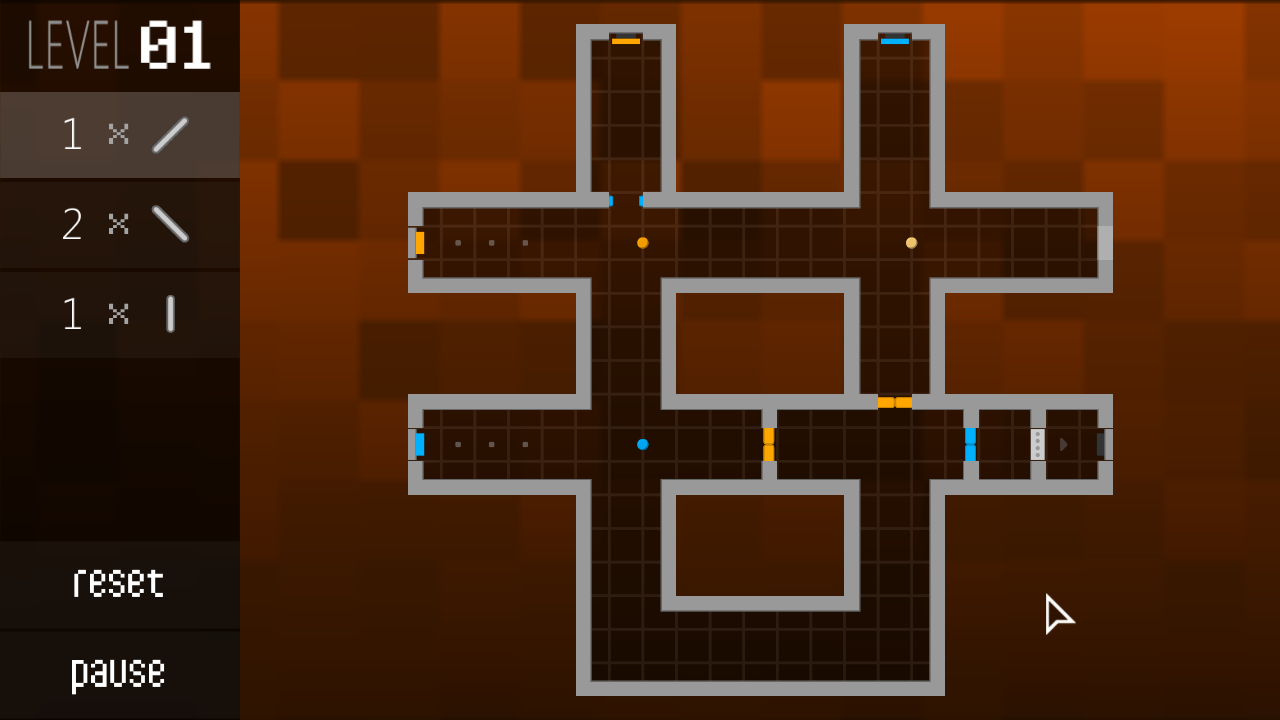
Screenshots
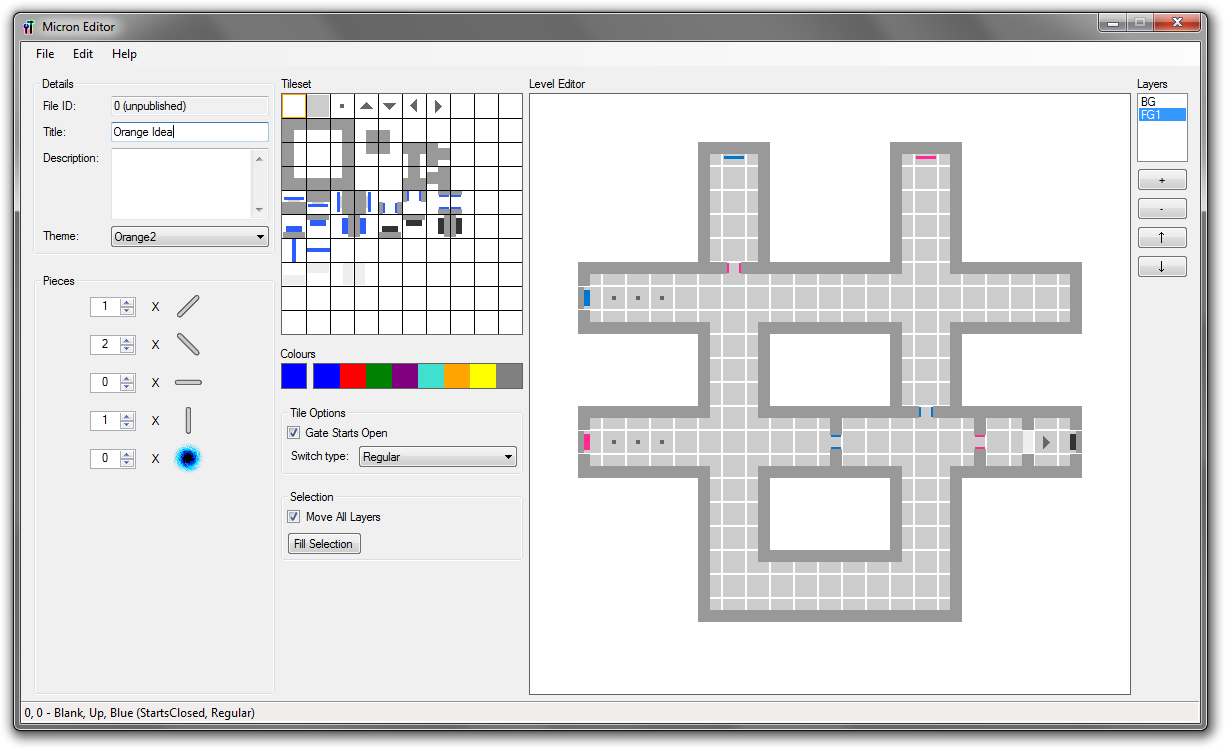
Level Details
- File ID: The published file ID assigned by Steam when the level is first published. Cannot be edited directly.
- Title: The level title displayed in game and on the Steam Workshop.
- Description: The level description displayed on the Steam Workshop.
- Theme: The level theme, i.e. colour and music. Each theme has several variations with the higher numbers having more layers of music.
Colours
The tile colours in the editor are not used in the game directly. Rather, the colours are based on the selected theme with the leftmost colour (blue) representing the primary colour in that theme, the second colour (red) representing the secondary colour, and so on.
Tile Editor Controls
- Left-click to draw using the selected tile
- Arrow keys to change selected tile
- Page Up/Down to change selected layer
- Ctrl-Z to undo last action
- Right-click and drag to select a region on the editor
- With a region selected:
- Arrow keys to move the region
- Enter to fill the region with the selected tile
- Left-click to deselect region
General Tips
The editor is is very basic and will not do much to help you with the actual level design. It's up to you to create functioning levels.
-
Most levels require only two layers: the BG layer (background) and one FG layer (foreground)
-
The BG layer should be used only for floor tiles
-
A level requires at least one cannon and one exit and you will need to complete the level in Micron before it can be published
-
Balls can't travel over empty space so make sure you have floor tiles where necessary
Playing a Level
To play a level in Micron you need to save the level file in the Levels folder.
This folder is located at <steam>\steamapps\common\Micron\Levels
After saving the level you can play it in Micron by going to Workshop > My Levels from the main menu.
Publishing a Level
- Follow the steps above to play your level
-
When you complete the level (to prove it can be completed) you will get the option to publish or cancel
- Click publish and wait for the level to upload
- After the level is published you will be taken to the Workshop page for your level where you can verify and edit details like the title and description
When a level is published Steam assigns it a unique ID. Micron saves this ID in your level file so that you can update the level later if you want. Make sure to hold on to the level file if you want to be able to update the published level!
Updating a Level
- Open your published level file in the Micron Editor
-
Make your changes
- Note that the title and description cannot be edited in the Micron Editor after a level is published. Instead, you can edit these details directly on the Workshop page.
- Save the level
- Complete the level in Micron
- You will be given the option to update or cancel
- Click update and wait for the level to upload
- After the level is published you will be taken to the Workshop page for your level
Contact
If you need any help with the editor or have any other questions or comments please post in the Steam forum.
